I recently read Michael Hinze’s Limiting Choices – a Storyline Question, which was a response to a question in the Heroes community where a member wanted to limit learners to making exactly 3 out of 8 choices and then display the choices on the following slide. If you aren’t already, you should follow Michael’s work on his blog, on Twitter, and in the Heroes community.
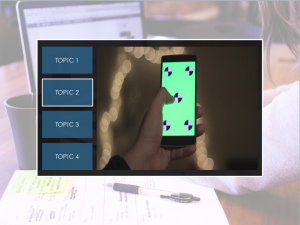
When I saw his post, I immediately thought of a course I worked on several years ago where I did something similar (in Storyline 1), so I thought I would share how I tackled the problem. The course had a few extra twists, the first being the need for two columns of items to select, but only one set that needs to persist to the next slide.
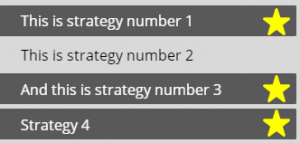
The first slide has a list of strategies for doing a particular task. The learner reads through the list and selects a check mark if he/she has used the technique. They can check as many or few of these as they like.
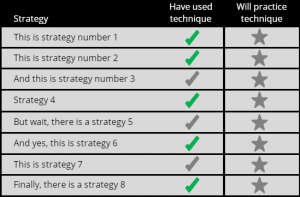
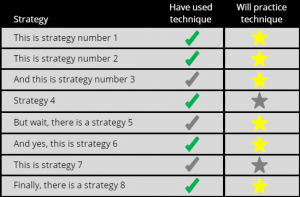
Then the learner must select 3 strategies in which they will practice the technique. These are the yellow stars. So this is where the limit comes in – exactly 3 – no more, no less.
Let’s start with the check marks. I created True/False variables for each of the check marks and set the default value to False. I created a Normal (grey) and Selected (green) state for each check mark. I also created hotspots for each check and star.
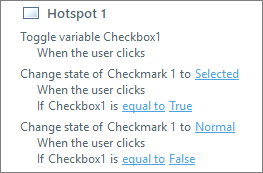 Next, I added the following triggers to each check hotspot. The first trigger toggles the Checkbox trigger between True and False. The default value is False. If the learner clicks a check, the variable changes to True and the second trigger takes affect, changing the check from grey to green. If the learner clicks the check again, the third trigger changes Checkmark back to False and the color of the check changes back to grey. Each check hotspot has these three triggers, so the learner can select as many or few of these as desired. The check marks serve as a type of review for the learner. Have I done these things or not? These do not persist to the following slide.
Now, on to the stars. I created True/False variables for each of the stars and set the default value to False. Each star has two states, Normal (grey) and Selected (yellow).
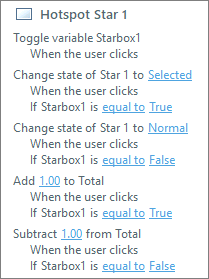 Next, I added triggers to each star hotspot. The first three triggers are the same as those I created for the check hotspots – a toggle that changes the value of the variable, and triggers that change the state of the stars between Normal and Selected. Again, the learner can select as many or as few as they want. But, I only want them to select three stars. So I added another variable, Total, to keep count of how many stars are selected, and two additional triggers that either add 1.00 to Total if True (selected) or subtract 1.00 from Total if False (not selected). The Total variable is a numeric variable with a default value of 0.
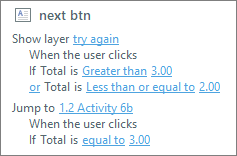 Finally, I add two triggers to the Next button. I add a layer to the slide as a gate screen. If the Total variable is greater than 3 or less than or equal to 2, the layer displays with a message reminding the learner to select three starred items. Then, when they select three items (when Total = 3), they advance to the next slide.
So that takes care of the requirement for only 3 items. The next challenge is making sure the selected 3 items appear on the next slide.
 For slide 2, I copied the 8 strategy text boxes and the 8 stars. I removed the Selected state from each star and added a Disabled state. I set the initial state for each star to Hidden. I also added a Chosen state to each text box with a dark rectangle to better highlight which strategy is chosen.
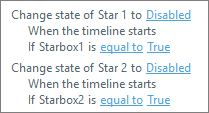 For each star I added a trigger that changes the state of the star to Disabled if the associated variable is equal to True. Variables persist throughout a course, so when you select your three stars on the previous slide, the variables associated with those stars changed to True.
 I also added a trigger that changes the state of the strategy text to Chosen if the associated star variable is True.
Another twist in this course was the request to have the learner think about and type in their plan for practicing each of their starred strategies.

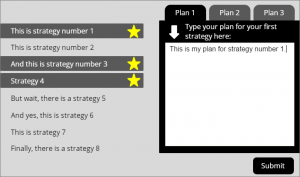 For this I added a 3-tab interaction to the slide. Each tab displays a layer. Each layer has a text entry box for learners to type their plan. When the learner is done entering their plans, they click Submit. Their entries are stored and displayed in a review slide at the end of the course via a reference variable (e.g., %plan1%).
I’ve included a demo and the source file (SL 360) if you would like to take a closer look.
 Comic book designs are great for e-learning projects. They engage people through the art of visual storytelling. For some great examples of using comic book designs in Storyline, check out E-Learning Challenge #11:
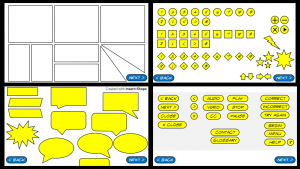
  To celebrate the end of one year and the beginning of the next, I thought it would be fun to share some templates and assets that you can easily customize to fit your e-learning projects. Starting December 25th I will share one e-learning template or asset (built with Storyline 360) per day for 12 days. I’ll share the demo and the source file for FREE.